Growing Seedlings in the Flex Micro
Updated
Use your Flex Micro to grow strong, healthy seedlings for your Flex Farm or Flex Acre. Germinate seeds under a humidity dome with the light off, then turn the light on and transplant once seedlings develop their two true leaves.
Materials needed:
- Measuring Cup
- Measuring Spoons
- TDS Meter
- pH Test Kit
- pH Down
- Nutrient A & B
- Potable Water (Pitcher or Hose)
- Seeds
- Rockwool
- Black Nursery Trays (perforated & non-perforated)
Before using pH Down, the pH test kit, nutrients or rockwool, read their Safety Data Sheets.
Growing Seedlings in the Flex Micro
The Flex Micro was designed with seedlings in mind. This tool allows the development of strong, healthy and fully developed seedlings that can be transplanted into the Flex Farm or Flex Acre.
Once seeds are sown and the tray is placed in the Flex Micro, the growing process becomes mostly hands-off.
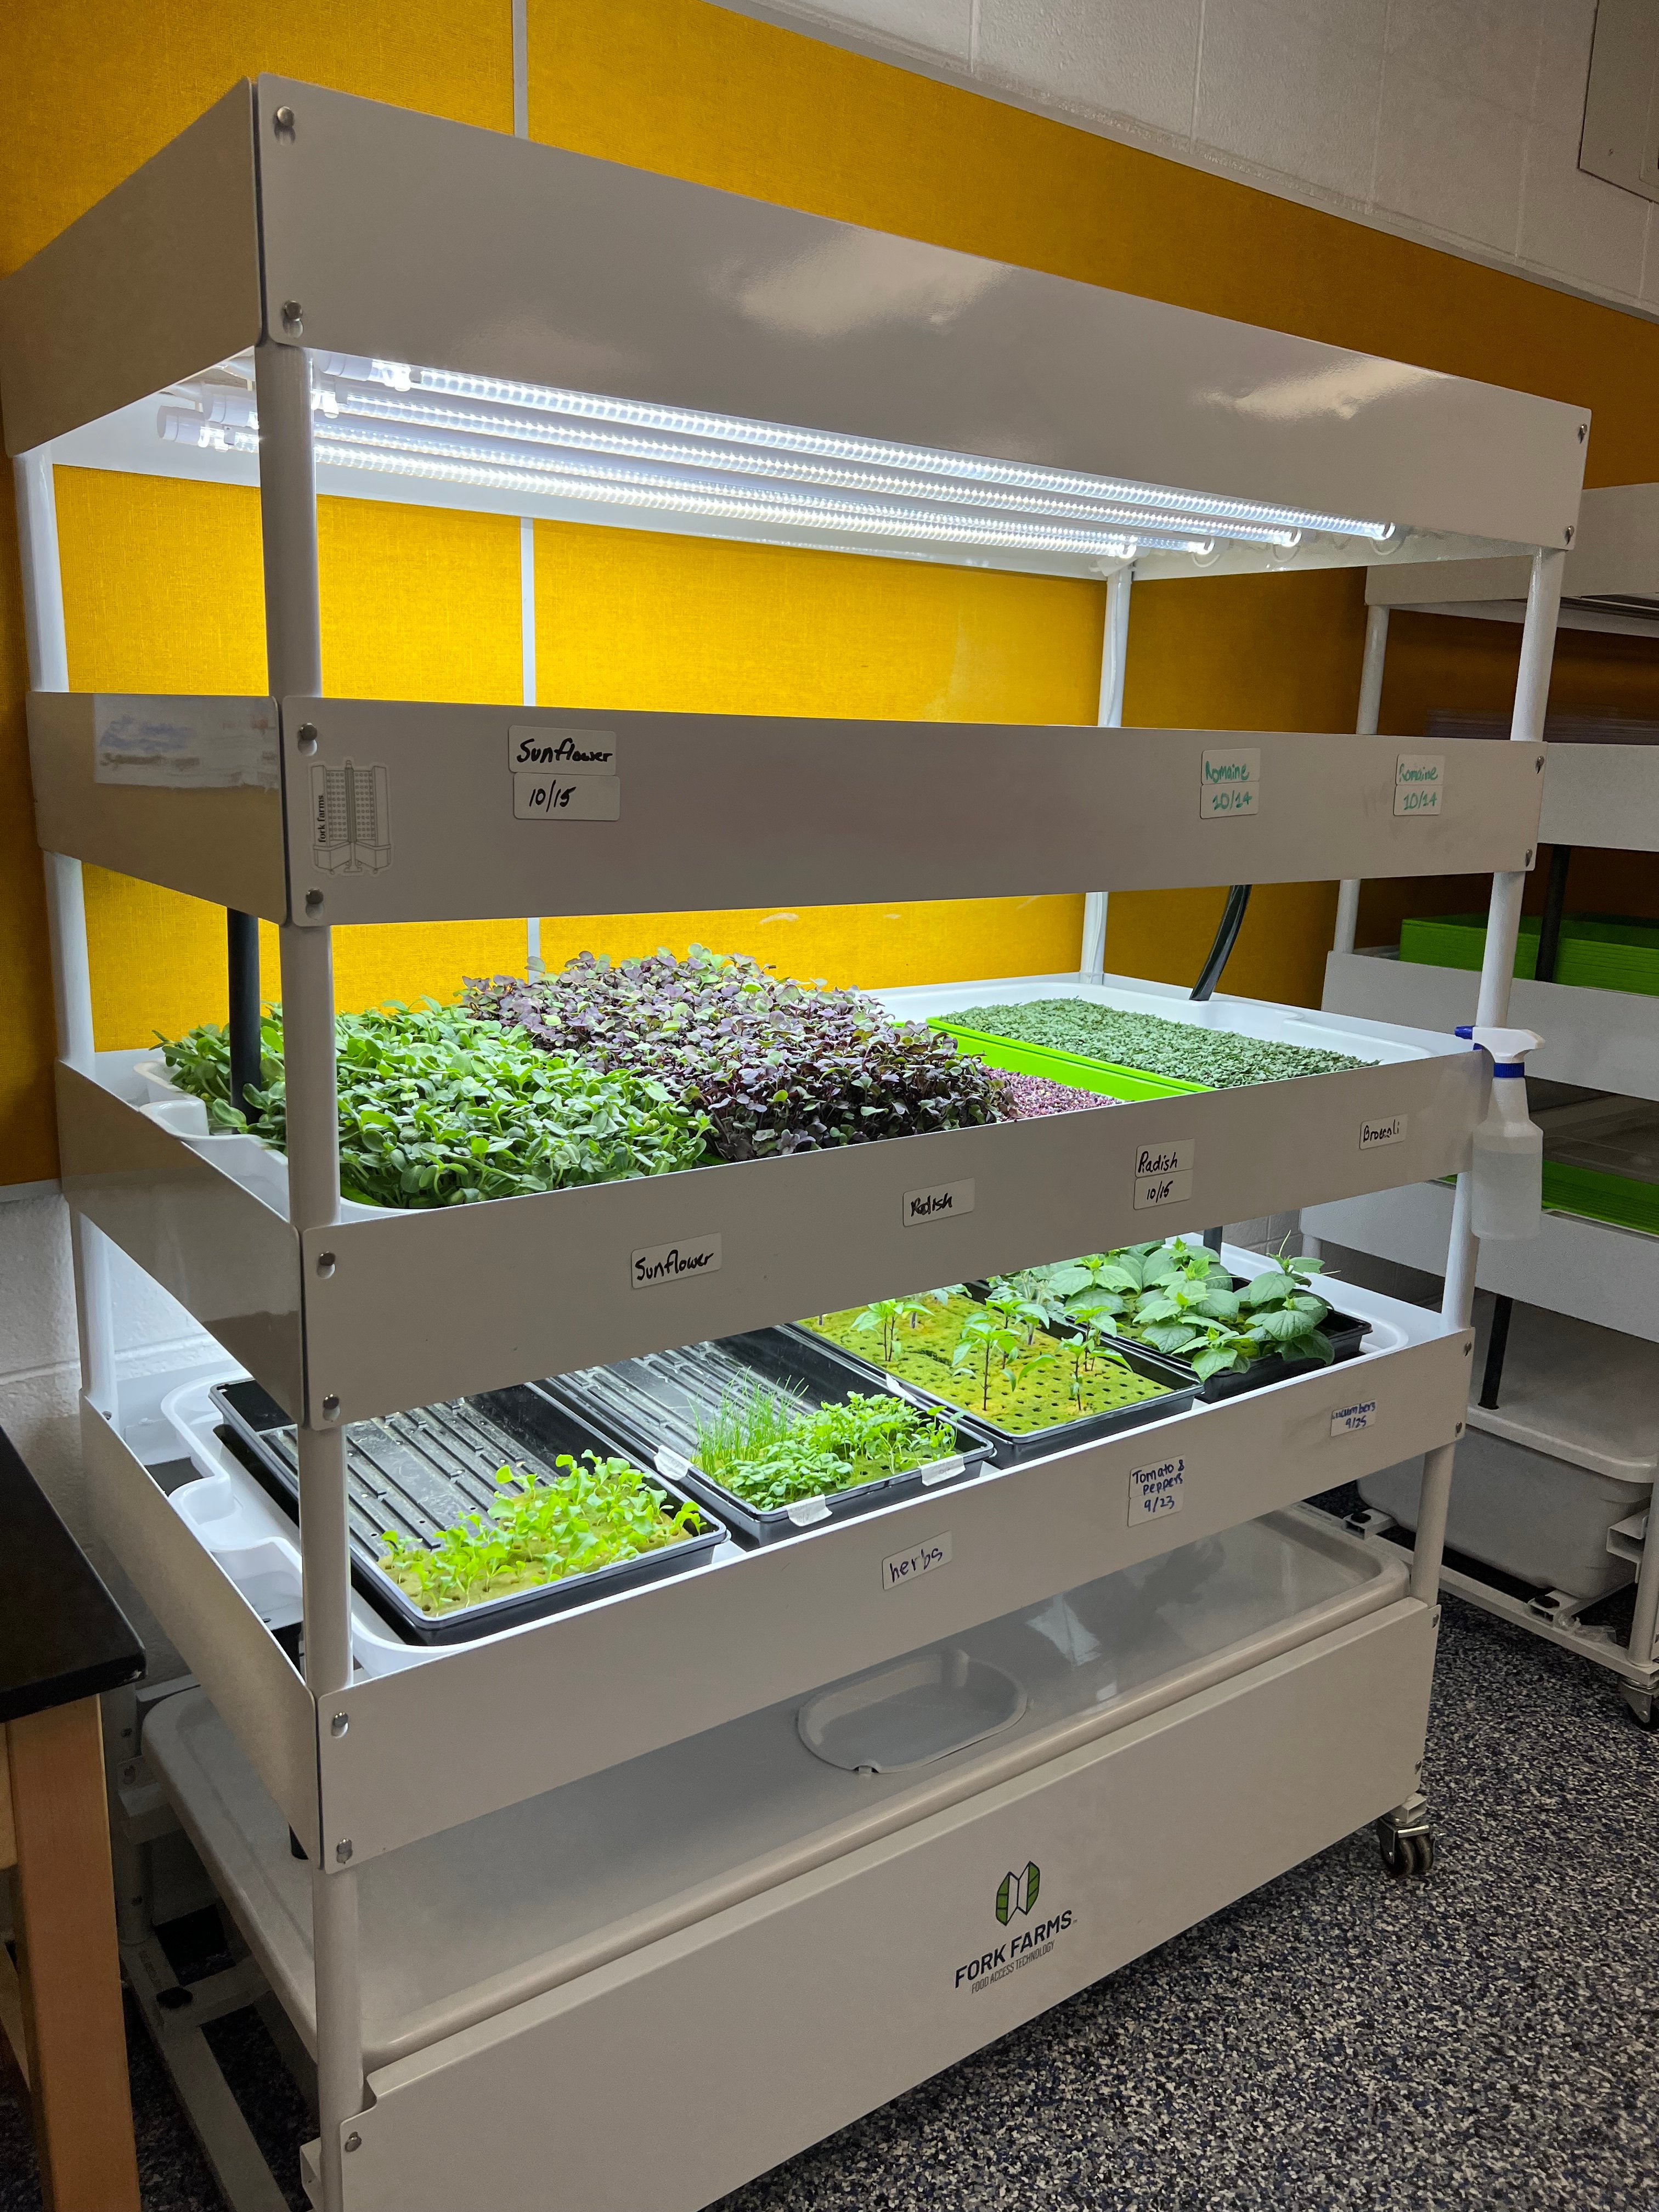 In this picture, there are herbs, tomato, pepper and cucumber plants in the bottom shelf, while microgreens grow in the middle shelf (see Growing Microgreens in the Flex Micro (Part 1 of 4)).
Before planting seeds, make sure your Flex Micro is set up as described in Setting up your Flex Micro, with the pump on for 15 minutes every 12 hours, a non-perforated tray in every unused slot, and the light off on any tier without uncovered, growing plants. While your seedlings grow, check the tank's water, nutrient, and pH levels at least twice a week as described in Flex Micro Deep Clean and Weekly Maintenance.
Germination & Development
After planting seeds, you need to mimic the correct environment for germination. This is done with humidity, and without nutrient-rich water and light. Each plant variety may take more time to germinate than others. Follow these steps:
- Stack a perforated nursery tray inside of a non-perforated nursery tray before planting seeds.
- Saturate rockwool with water. Pour any excess water from tray.
- Plant seeds.
- Each plant variety has a different seeds-per-hole recommendation. For lettuce and other leafy greens, basil, brassicas, rainbow greens, edible flowers, and fruiting plants, plant one seed per hole. For other herbs, follow the seeds-per-hole guidance in Herb Grow Guide. Some seed packets may list other recommendations.
- Cover tray of seedlings with a clear humidity dome and remove the non-perforated nursery tray.
- Place the tray of seedlings in the Flex Micro.
- The light should be off.
- Seed varieties vary in time to germination. Check your seedlings once per day and spray them with water to promote humidity.
- Germinated seeds look like they have a stem curling from the seed. Here's an example of lettuce seeds germinated after 2-3 days of growing. You can see the seedling curling out of the seed casing. They were planted on a Wednesday and moved into the Flex Micro on Friday.
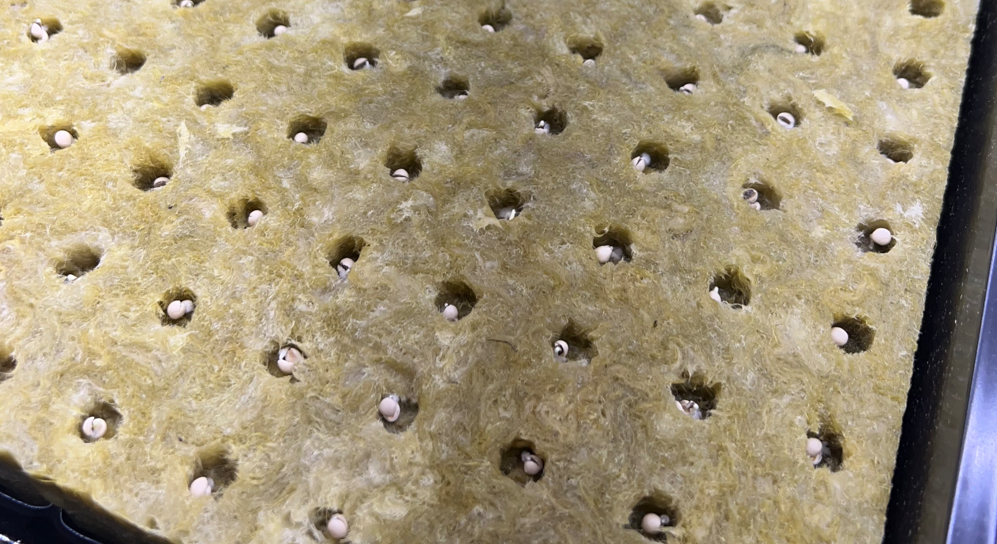
- Once all seeds have germinated in the nursery tray, remove the humidity dome.
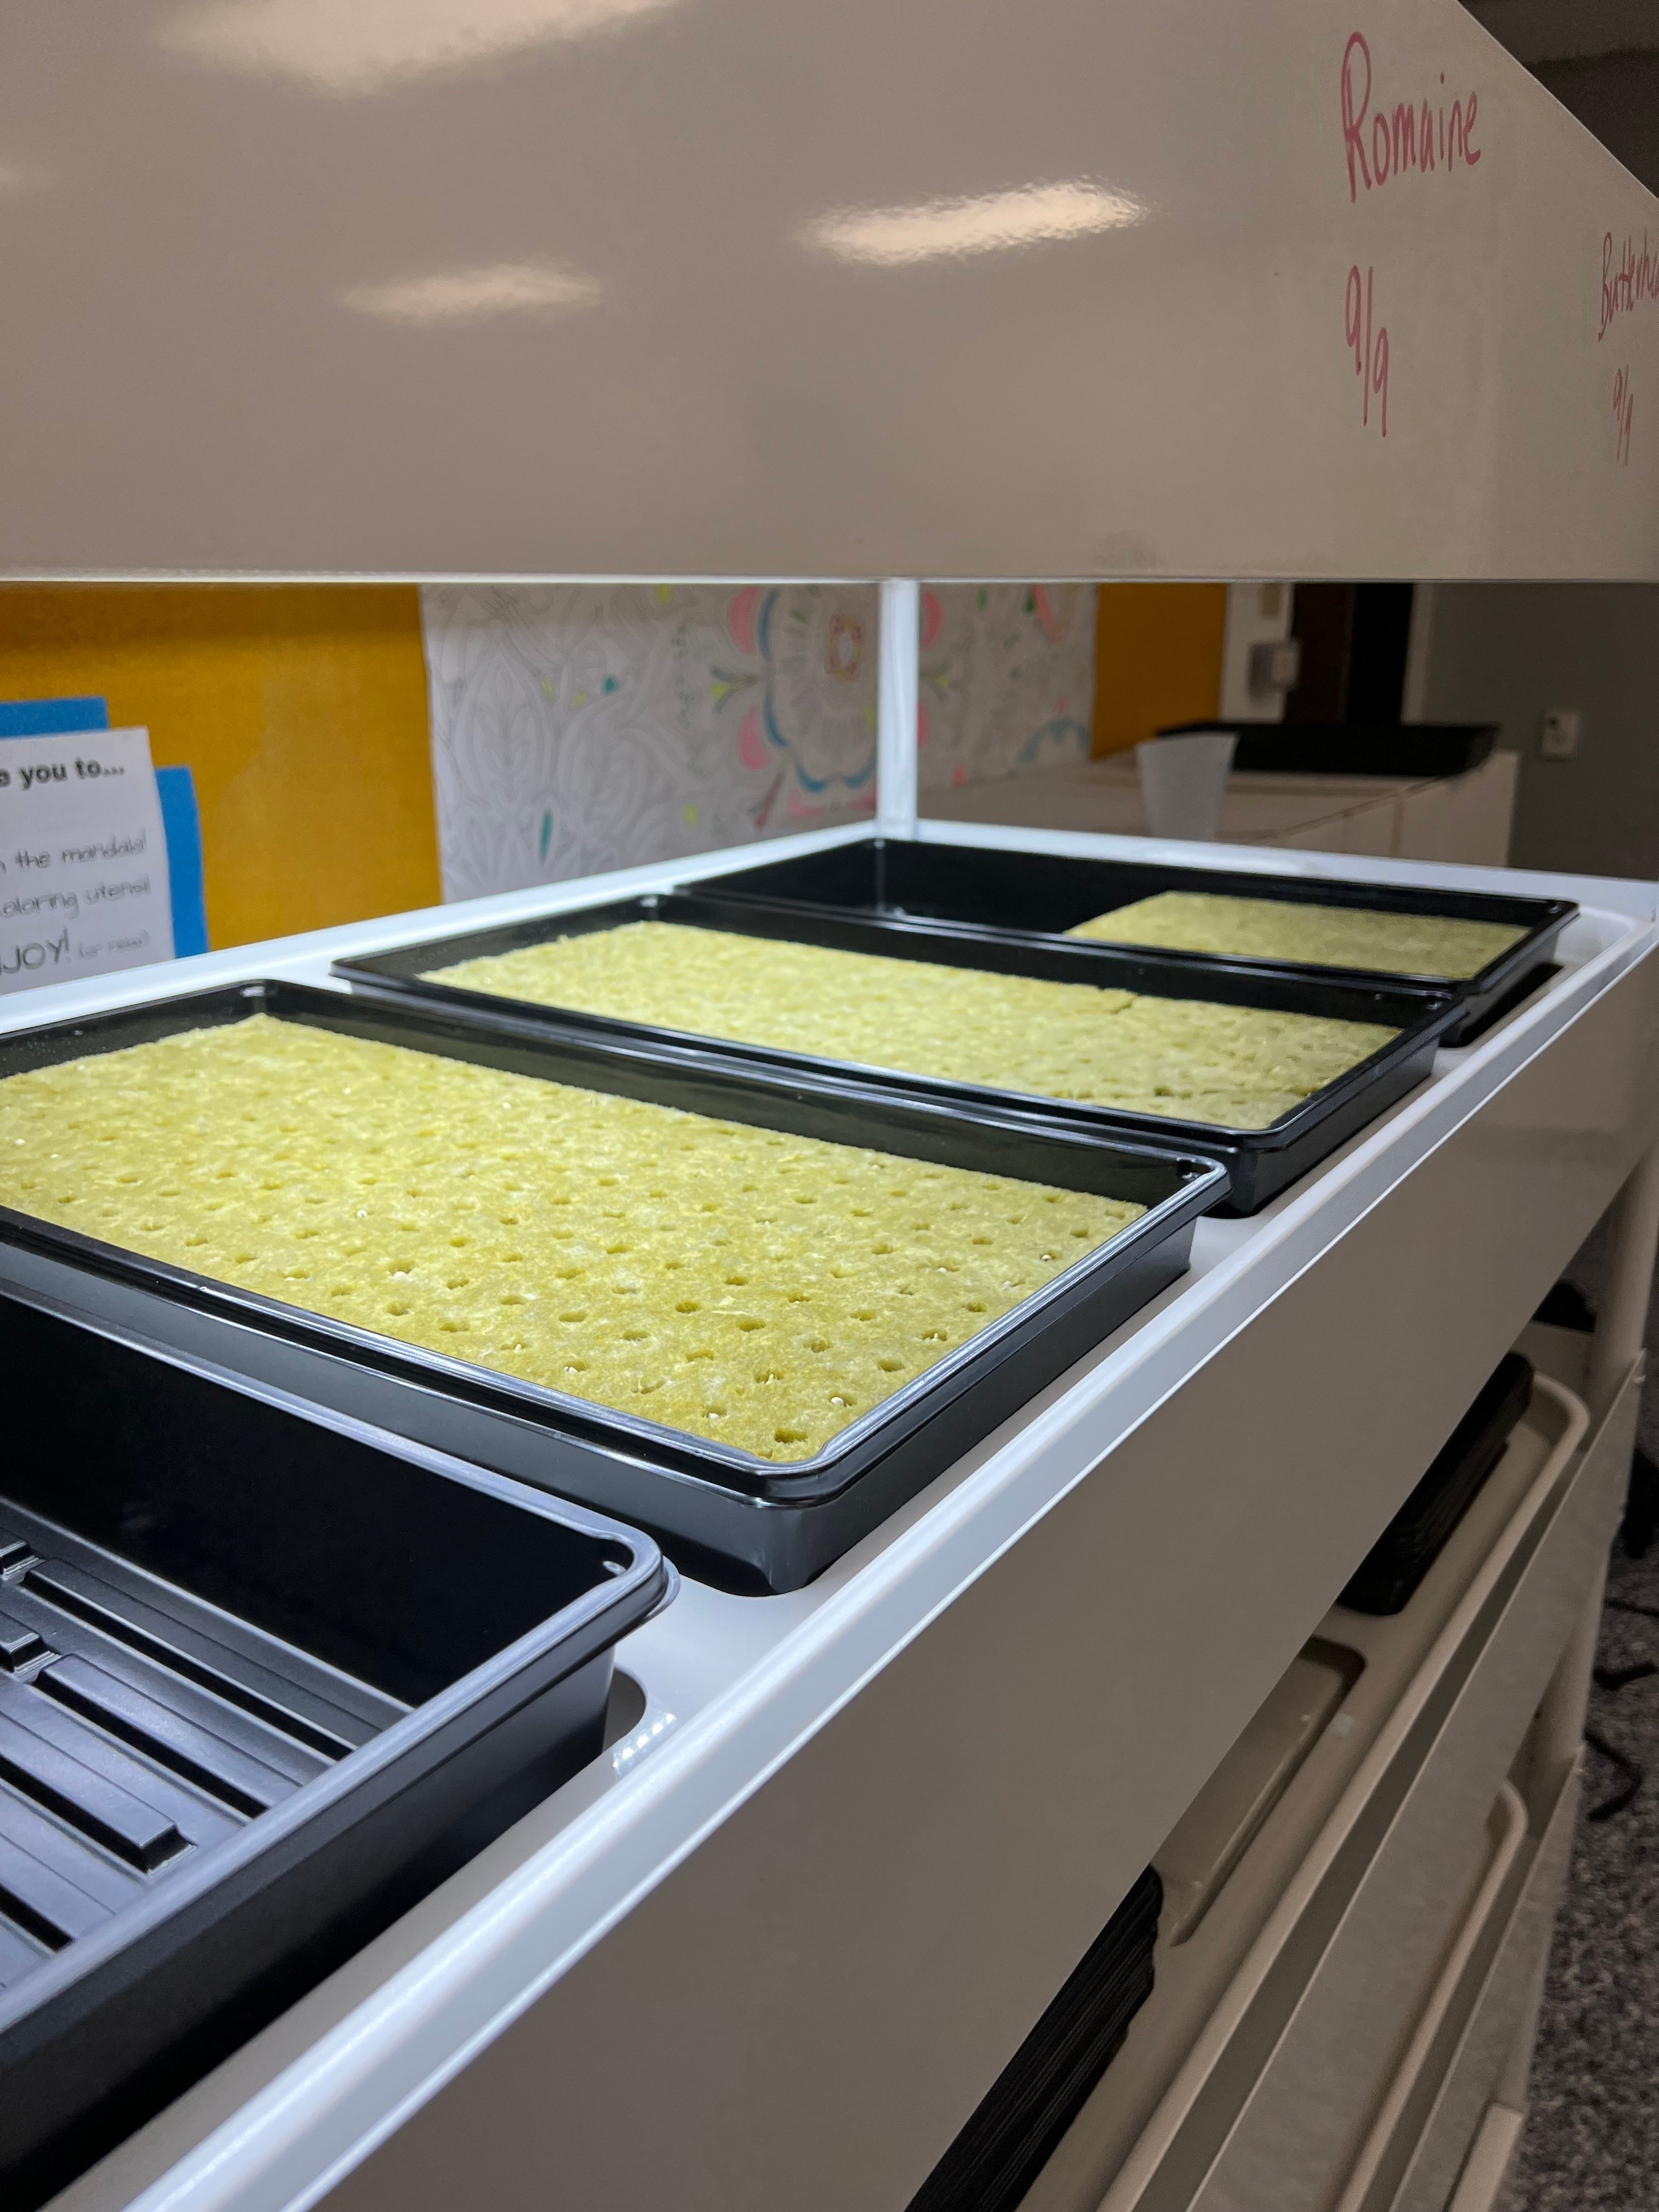
- Turn on the lights and confirm the pump is running.
- The seedlings can grow in the Flex Micro for 1-2 weeks. Lettuce is usually ready to transplant 7 to 10 days after planting (see How to Transplant Seedlings into Your Flex Farm).
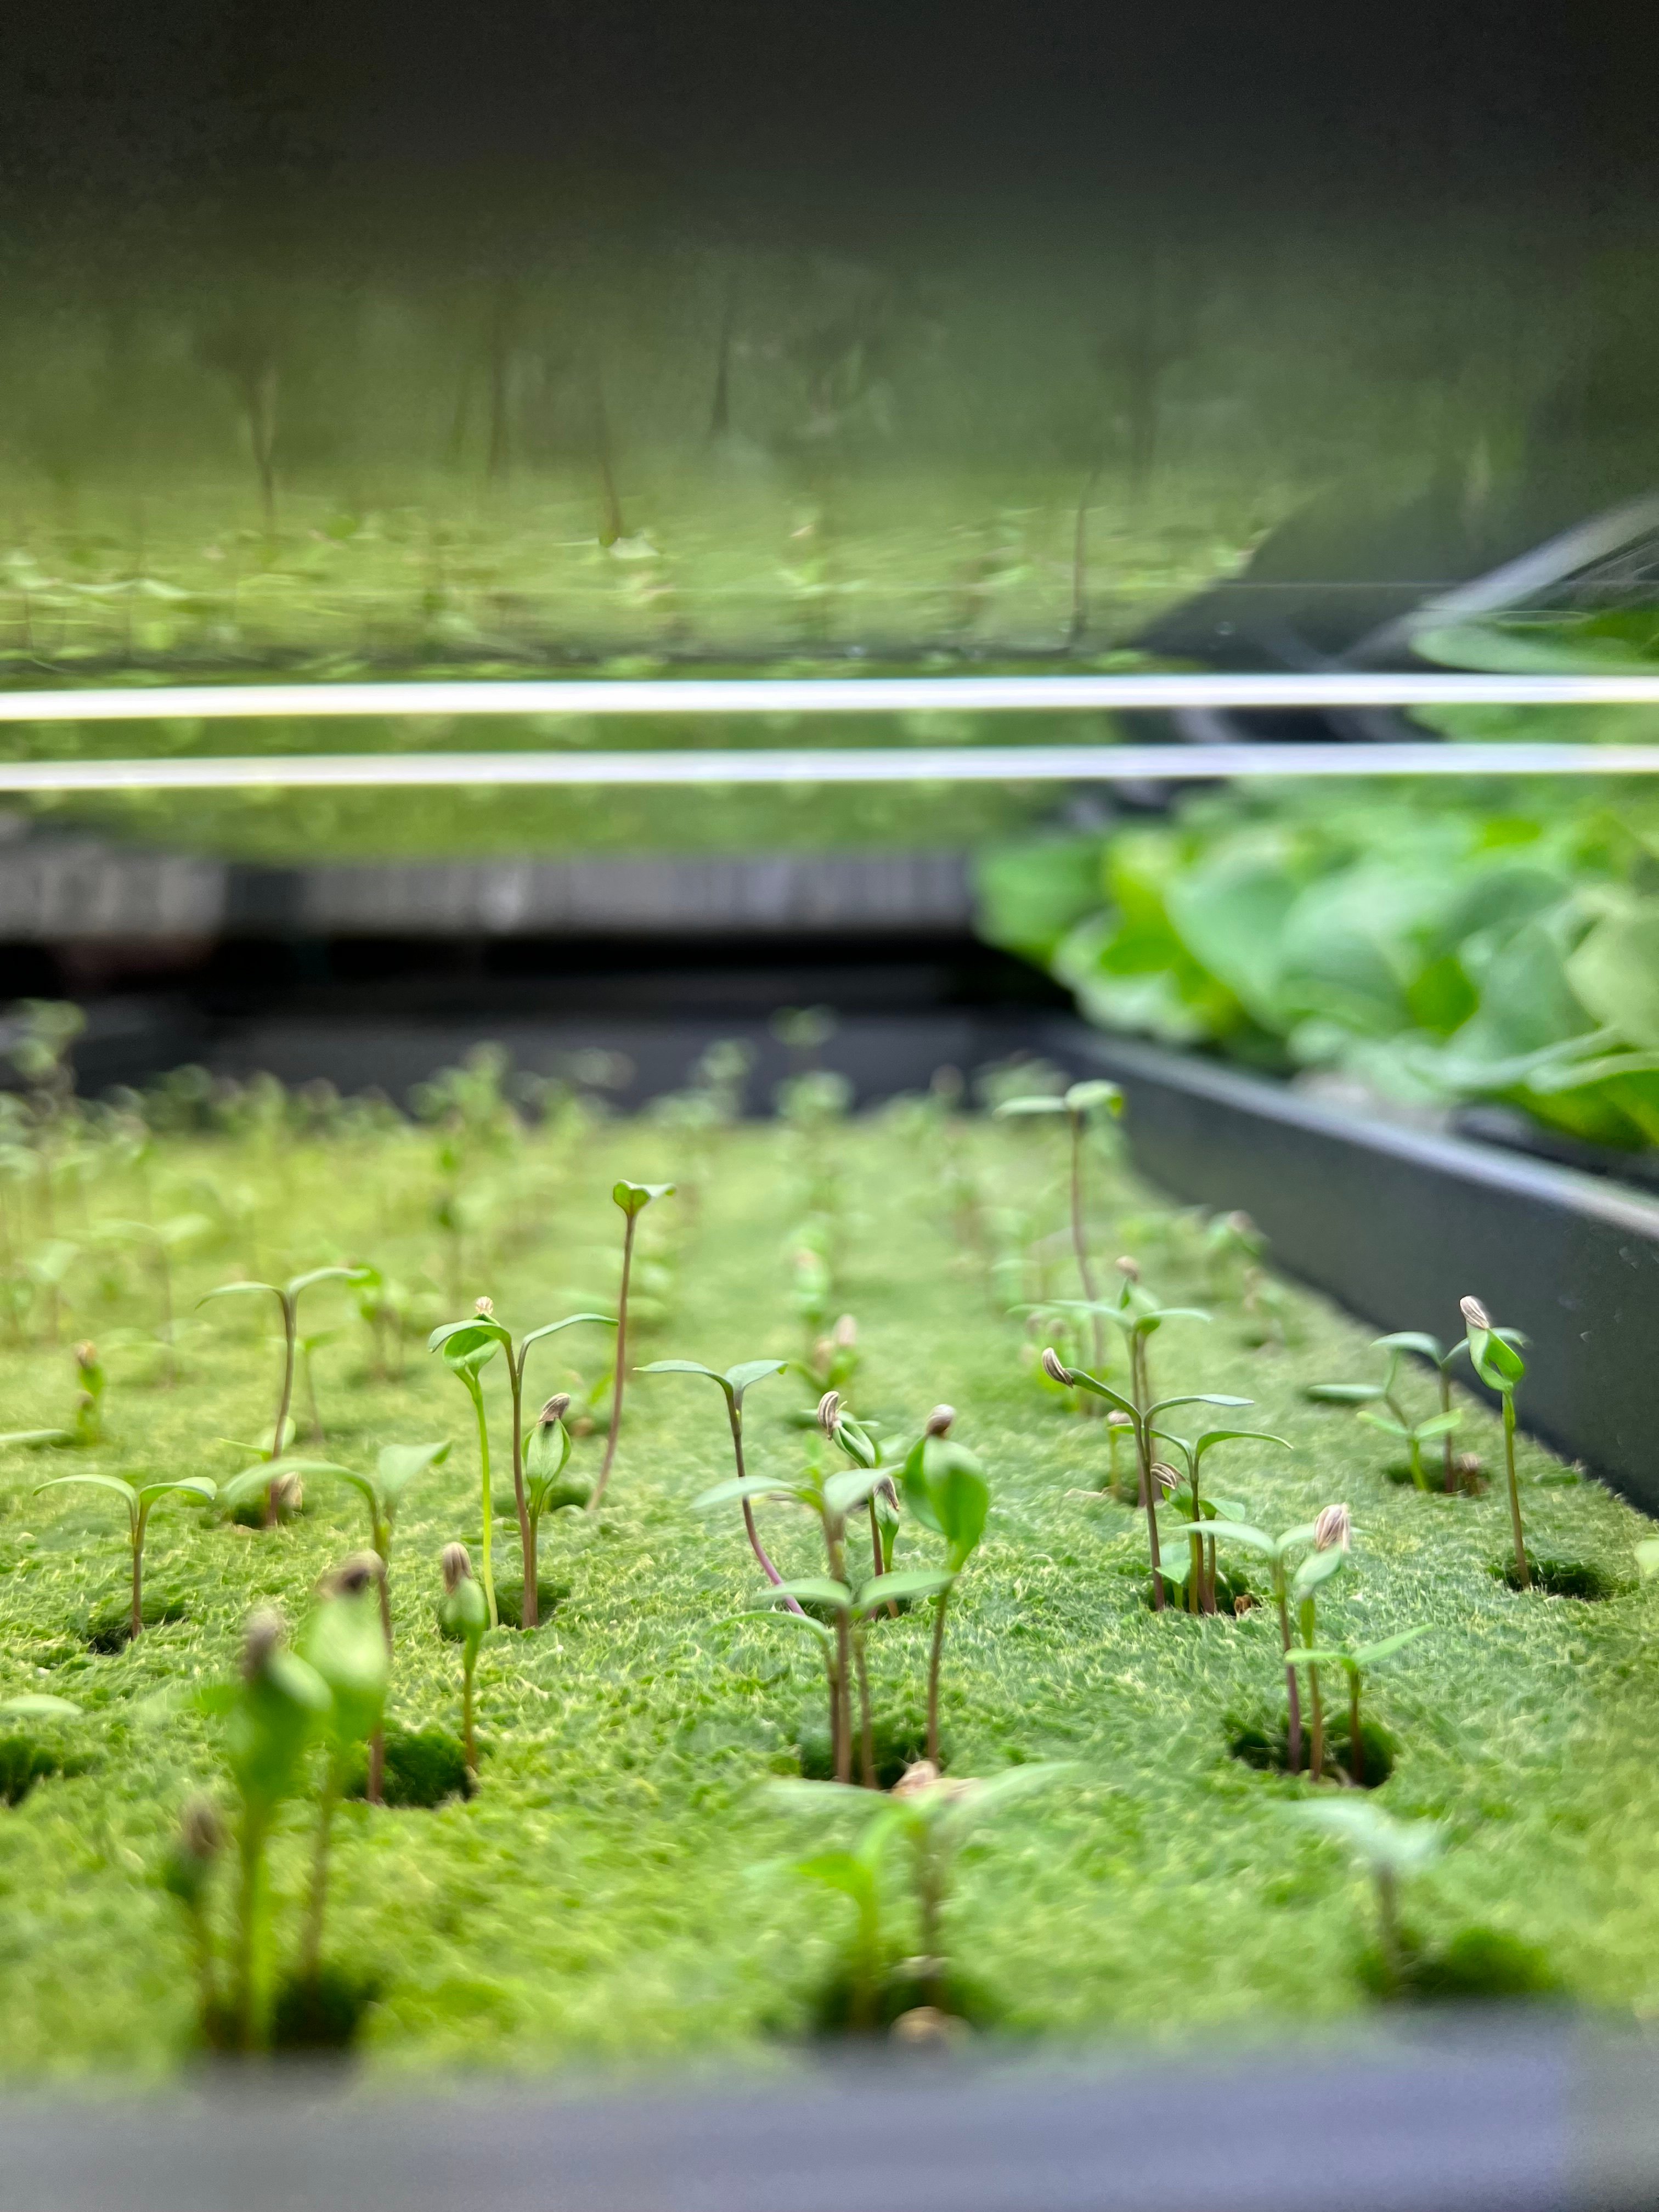
- Transplant your seedlings into the Flex Farm or Flex Acre once they have developed their two true leaves!
The rockwool may turn green while in the Flex Micro. While algae is normal in hydroponics, you can limit its growth by keeping your total dissolved solids count close to your target number, and by cleaning the system regularly.
Starting Seeds for a Flex Connect Farm
- Plant 150 seeds for each Flex Farm in your rotation. For example, for 3 Flex Farms, plant 450 seeds.
- Use masking tape on the rim of each nursery tray to note the seeding date, the rotation it belongs to, and the seed varieties.
- If you run more than one pump, stagger their timers so no two pumps run at the same time.
- For the rest of your Flex Connect routine, see Flex Connect Operating Schedule & Protocols.